Assembling a 12v Water Valve
I just picked up a few knick-knacks with which to start prototyping part of an implementation for my irrigation-related use case. In this article I’ll be assembling a 12-volt water valve that I will use in tandem with a Z-Wave dry-contact relay to automate filling my 500+ gallon rain tank from a garden hose.
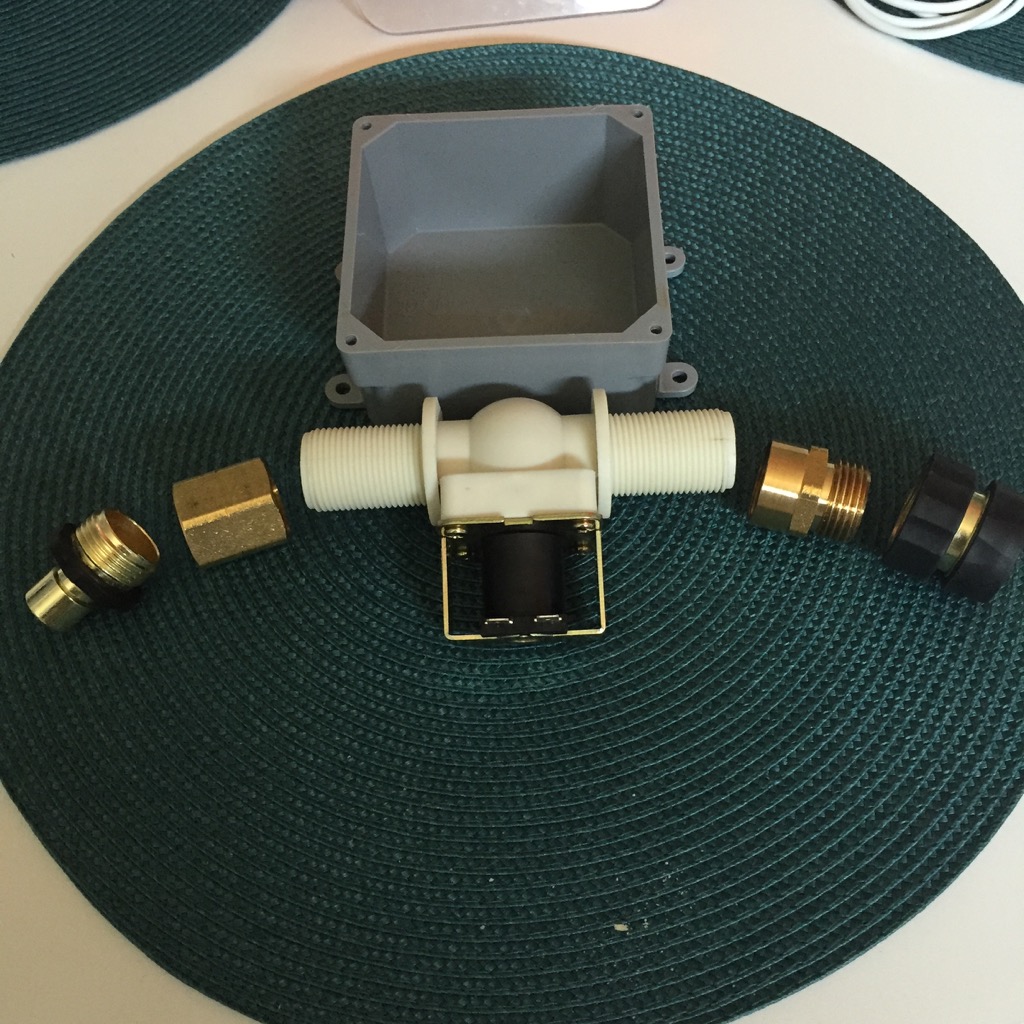
In this exploded view are all the project pieces that will go into assembling this valve:
- The valve itself. It’s a 3/4-inch pipe with a 12-volt solenoid valve controlling the flow. At 3/4-inch it will keep up with even “heavy duty” garden hoses for maximum throughput.
- On the left, a brass female-female adapter that accepts a garden hose on one side and is threaded for 3/4-inch pipe on the other. This will mate perfectly with the valve and will accept a hose on the inlet side.
- On the right, another brass adapter, this time with female 3/4” pipe threading on one side and male garden hose threading on the other. Again, it will mate with the valve’s threading and attach to a host on the outlet side.
- A standard 4”x4”x2” PVC box from the electrical section of the hardware store. It’s the perfect size to house this valve.
- On the far edges are a set of brass hose quick-connect adapters that will finish the design off, at least for now.
I spent a little more than I needed to on those brass hose-to-pipe adapters. I have seen vinyl ones at different hardware stores that are cheaper than the brass ones, but it’s like a $10 difference, and the brass fittings are never not going to work.
I should mention that a fully-assembled Z-Wave water valve like I’m assembling here can cost in the neighborhood of $400-500, so an extra $10 for brass fittings isn’t the end of the world.
First Step

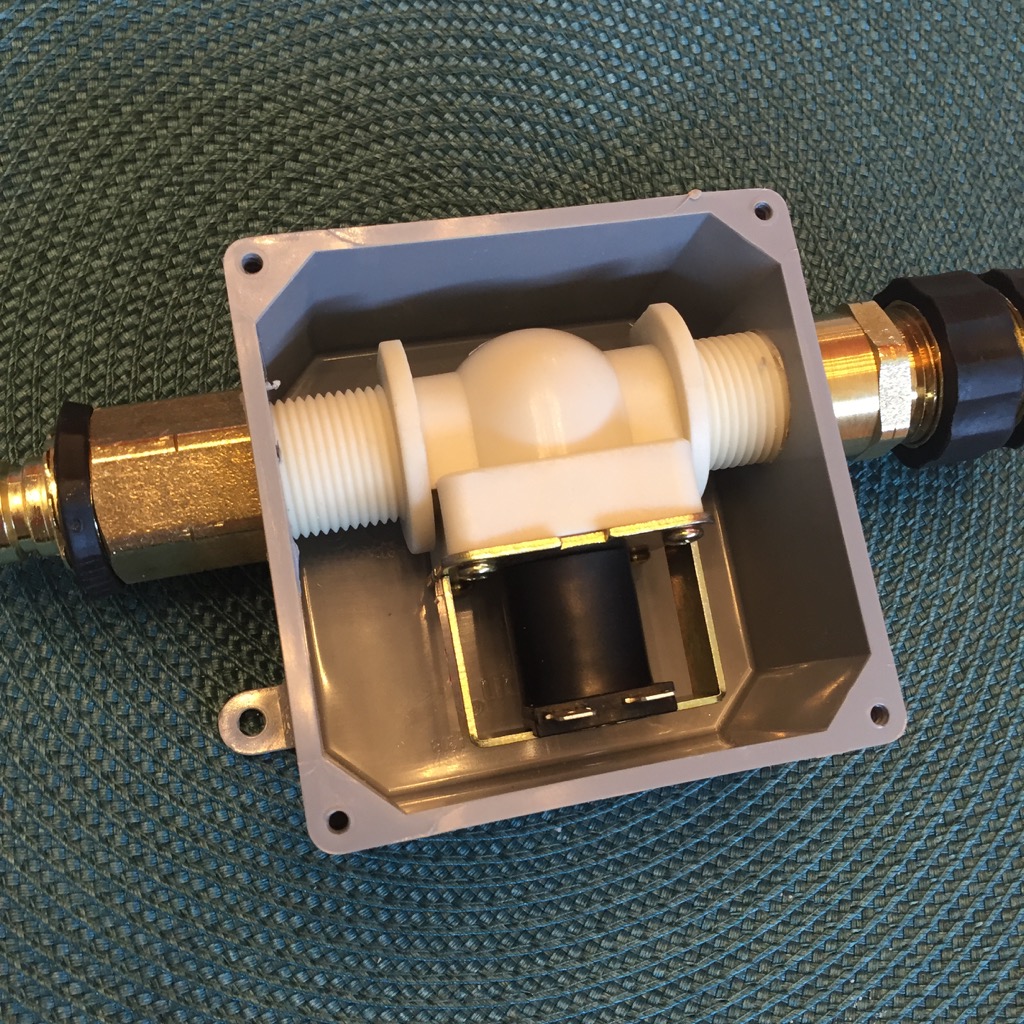
First step: put the valve into the box. Pop!
With that installed, It’s a simple matter of assembling the rest of the pieces. After putting some plumber’s tape on the threads I tighten the brass hose adapters onto the valve’s threaded arms. The female adapter goes on the inlet side of the valve, and the male adapter on the outlet side.
The valve has a little flow-direction arrow stamped onto its top so I know which direction is which. I also have oriented the valve with the solenoid’s contacts facing up.
The fully assembled valve looks like this:
Second Step
With the valve in the box and the adapters in place, this thing is ready to accept a garden hose on either side. I could finish it up with some silicone to fill any gaps in the box, but I’ll do that later on.
The second step is to get power to this thing. The solenoid has big spade connectors sticking off it, and my original plan was to use some crimp-on spade terminals to connect the solenoid to its power source.
Since the box is only 2” deep there’s not enough room to do that if I want to be able to put the lid on, so I’ll go with plan B using some bits and pieces I have laying around.
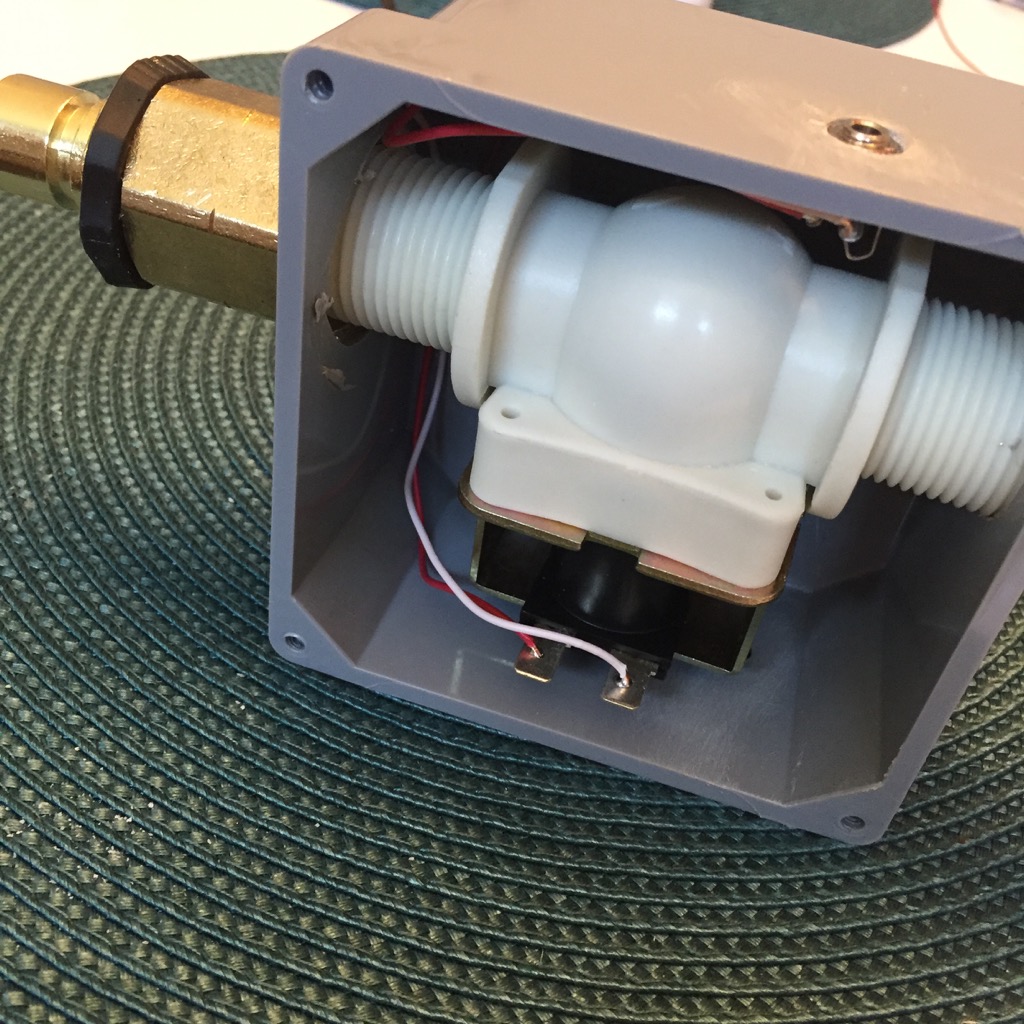
First I find some old 18-gauge thermostat wire and grab a red and a white conductor. These get soldered onto the solenoid’s spades.
The other end I solder to a panel mount 1/8” jack that is meant to accept a TS connector (that’s Tip and Sleeve, or “mono” if it were an audio jack).
The jack has an outer diameter of 1/4” and the washer and nut need about 3/8” of clearance. The PVC box is much thicker than the jack is, so I first drill a 1/4” hole through the box and then carefully drill a 3/8” counter-sink space around it. This allows me to mount the jack into the box (heh) such that it sits flush.
In this image you can see the finished valve. I’ll supply 12V power to the solenoid via a 1/8” TS (mono) plug that I can just plug straight into the box.
Testing The Plan
Outside, I attach a hose to either side of the unpowered (closed) valve, and open up the hydrant to full-blast. Everything is solid and dry.
I happen to have access to 12V and a mono plug, so I plug in and the valve opens and fires water out the other end, while the pipe and adapters on the outlet side stay water-tight as well.
Next Steps
The application of this doo-dad is to attach the solenoid to a Z-Wave relay that will switch 12V on demand, so that is the component I need to consider next.